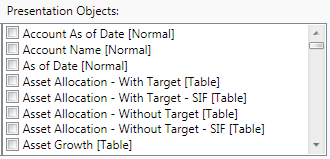
WPF Checked ListBox
WPF currently does not have a checked list box out of the box so you’ll need to roll your own. Unfortunately most of the examples that come up on Google involve creating a usercontrol and writing some code.
Here’s one quick way that does not not involve writing any additional code.
Step 1: Start off by creating a class that will represent each checked list item in the list box. Obviously if you already have your data item all you need to ensure is that it has a boolean property to store the Checked/Unchecked flag.
public class CheckedListItem
{
    public int Id { get; set; }
    public string Name { get; set; }
    public bool IsChecked { get; set; }
}
Step 2: Create the list item that will be bound to the list box. I called my list AvailablePresentationObjects.
public List<CheckedListItem> AvailablePresentationObjects;
Step 3: The last step is to create the actual checked list box. I created a list box and used the HierarchicalDataTemplate to hold the CheckBox. The Name and the IsChecked property are then bound to the checkbox.
<ListBox ItemsSource="{Binding AvailablePresentationObjects}" >
    <ListBox.ItemTemplate>
        <HierarchicalDataTemplate>
            <CheckBox Content="{Binding Name}" IsChecked="{Binding IsChecked}"/>
        </HierarchicalDataTemplate>
    </ListBox.ItemTemplate>
</ListBox>
And walla!

Now the IsChecked property will reflect the value in the UI and vice versa. If you need real-time notification when someone checks/unchecks then you simply need to raise the PropertyChanged event in the CheckedListItem class.
