Tweaking the default search display template in SharePoint 2013
Let’s look at what it takes to make a minor tweak to the out of the box search result in SharePoint 2013. Say my requirement is to show the document id in the search result like the sample shown below.

For the example above I’m going to create a custom display template for PowerPoint files.
Let’s start by mapping the display templates folder as a local drive. Browse to /_layouts/15/DesignMapDrive.aspx and click on the /_catalogs/masterpage/ link to open the drive. You can then map that as a network drive.
Through explorer browser to the _catalogs\masterpage\Display Templates\Search folder and copy these two files file to a local drive.
- Item_PowerPoint.html
- Item_CommonItem_Body.html
Rename Item_PowerPoint.html to make it your own.
Open up the file and change the <title> node. This is what get’s displayed in SharePoint.
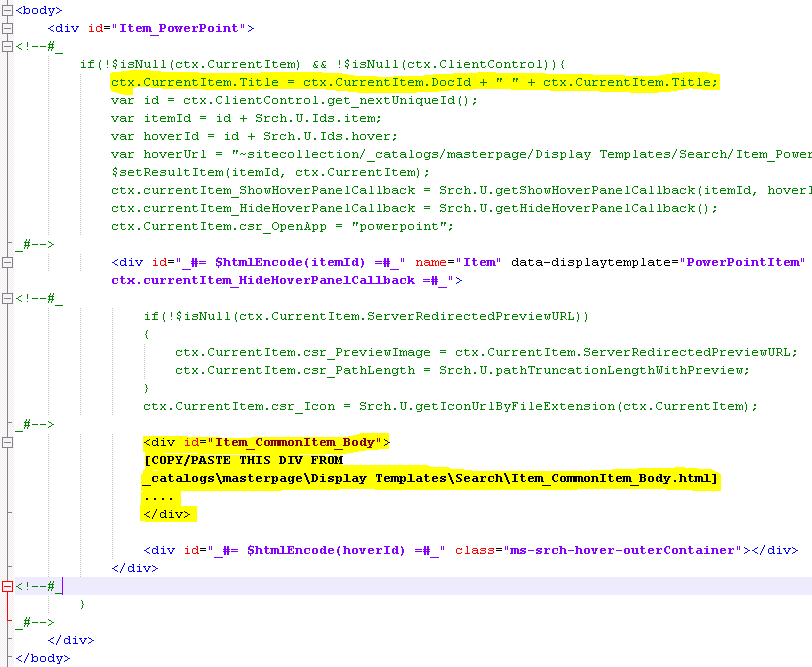
Make the changes highlighted below.
I’m basically updating the title in javascript to show the doc id. You would think this would be enough, unfortunately the render body method doesn’t seem to pick up the updated value. Instead you need to copy the entire div from the Item_CommonItem_Body.html file. Copy the Item_CommonItem_Body div from that file into your customised PowerPoint file and overwrite the line that makes the call to ctx.RenderBody.

Upload your custom html file to Search display templates mapped folder.
Now browse to the Manage Result Types page from Site Collection Administration and make a copy of the Microsoft PowerPoint result type.
From the Actions drop down pick the display template that you just uploaded and your all set.
